
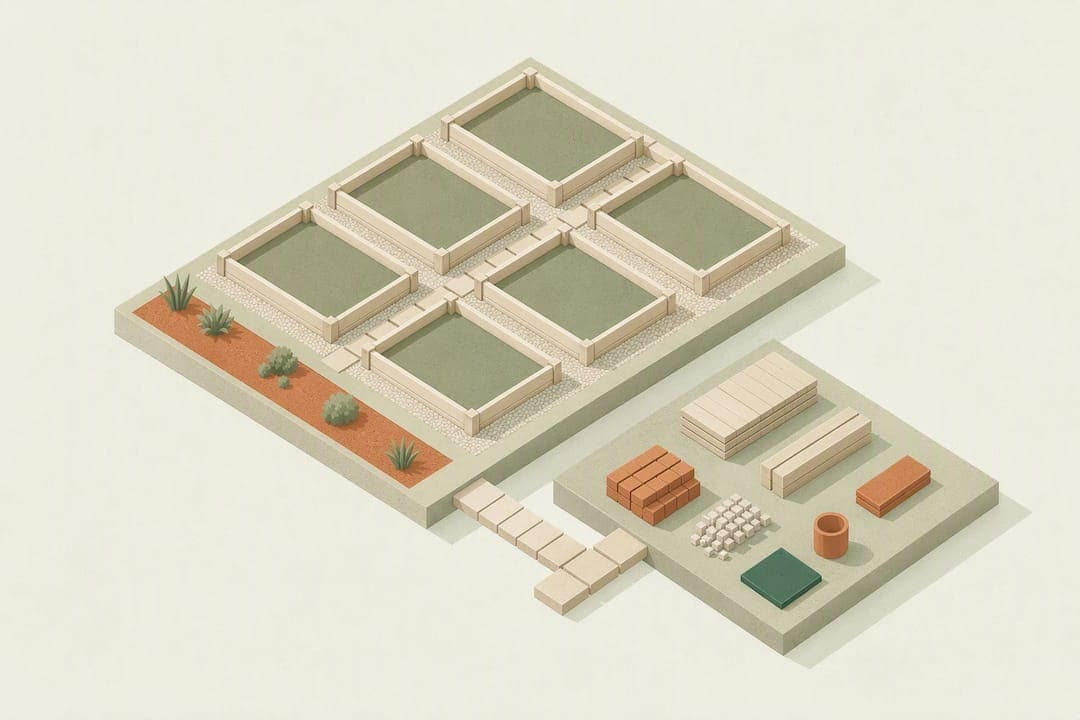
For most home vegetable gardens, the winning garden bed layout is a 4-foot-wide raised bed arranged in a block or square-foot grid, with 18 to 24-inch paths between beds. Keep depth at 6 to 12 inches for most crops and go 12 to 24 inches for anything deep-rooted like carrots or potatoes. Skip traditional single rows unless you're working a long, open plot with mechanical access. Your first move: grab graph paper or a planning app and sketch your beds at 4 feet wide, mark paths at 18 to 24 inches, and orient the whole thing before you buy a single board.
TL;DR:
- Block or square-foot grid layouts maximize space use, reduce weeds, and provide easier access compared to traditional rows, especially in small raised beds.
- Beds should be no wider than 4 feet for double-sided access, with paths of 18 to 24 inches; narrower if access is only from one side or if space is limited.
- Use a soil mix with three-quarters topsoil and one-quarter compost for native soil beds, or equal parts compost, vermiculite, and peat for square-foot gardening; drainage fixes are crucial on heavy clay.
- Place tall or trellised crops on the north side of the bed in the Northern Hemisphere to prevent shading shorter plants, and orient beds north-south for even sunlight exposure.
- Incorporate cold frames or hoop covers to extend growing seasons and allocate separate perennial beds or corner plantings for plants that do not fit crop rotation, avoiding mixing perennials with annuals.
Table of Contents
- Which Garden Bed Layout Style Fits Your Space?
- What Size Should My Garden Beds and Paths Be?
- How Should I Orient Raised Beds for Sunlight?
- What's the Right Soil Mix and Drainage Setup?
- How Do I Space Plants for Maximum Yield?
- What Materials Work Best for Building Raised Beds?
- How Do I Set Up Irrigation and Mulch for Raised Beds?
- What's the Best Workflow for Planning a New Garden Bed?
- Copy-and-Adapt Layout Templates
- How Do Companion Planting and Crop Rotation Fit Into Your Layout?
- How Do I Extend the Growing Season Without Redesigning Everything?
- Should I Add Perennials to a Vegetable Bed Layout?
- An Editor's Take on Garden Bed Layout Mistakes
- Turn Your Sketch Into a Priced, Buildable Plan
- Where This Guidance Comes From
- Sources
- FAQ
Which Garden Bed Layout Style Fits Your Space?
Block-style and square-foot layouts beat traditional rows for almost every home gardener, mainly because they eliminate wasted walkway space and cut down on weeding. Instead of single-file rows with a foot of bare dirt on each side, you plant in dense blocks where every square inch inside the bed grows something. Less exposed soil means fewer weed seeds germinate, and the plants themselves shade out competition once they fill in.
Traditional rows still make sense in specific situations: long, in-ground plots where you need a tiller or wheelbarrow to pass through, or crops like sweet corn and pumpkins that sprawl and need room to run. If you're gardening in a raised bed under 4 feet wide, rows waste space you don't have.
Vertical and trellis elements change the math again. A trellis for pole beans, cucumbers, or indeterminate tomatoes needs to sit where it won't cast shade on shorter neighbors. In the Northern Hemisphere, that almost always means the north edge of the bed.
Beyond the standard rectangle, a few shapes solve specific problems:
- Block/square-foot grids work best when maximizing yield per square foot is the goal.
- Straight rows suit larger, open plots with mechanical or wheelbarrow access needs.
- U-shaped or horseshoe beds create a central access point, useful for kids' gardens, or anywhere you want to reach everything without stepping over a border.
- Island beds surrounded by paths on all sides work well as focal points but need four-sided access planning.
What Size Should My Garden Beds and Paths Be?
Width is the rule that trips people up most. Cap your bed at 4 feet if you can access it from both sides. That distance lets an average adult reach the center of the bed from either edge without stepping onto the soil, which matters because compacted soil undoes half the benefit of building a raised bed in the first place.
Push the bed against a fence, wall, or in a spot only child will tend, and you should narrow it to 2 or 3 feet, since single-sided access cuts your comfortable reach in half.
Pro Tip: Measure your own reach before committing to 4 feet. If you have a shorter torso or limited mobility, 3 feet across might be your real maximum, and there's no rule that says every bed in your yard has to match.
Depth depends on what's growing and what's underneath. Six to 12 inches handles lettuce, herbs, and most annual vegetables. Deep-rooted crops like carrots, parsnips, and potatoes need 12 to 24 inches, and so does any bed sitting on a patio, driveway, or other hard surface with no soil access below.
Paths matter as much as the beds themselves. Standard walking paths run 18 to 24 inches, wide enough for comfortable movement without gobbling up growing space. Bump that to 36 to 48 inches anywhere a wheelbarrow, garden cart, or wheelchair needs to pass. Keeping every bed the same length across your layout also pays off later, since it simplifies drip line runs and lets you reuse row covers or hoops without custom-cutting each one.

How Should I Orient Raised Beds for Sunlight?
Orientation decides how evenly your crops get light through the day. A north to south bed orientation generally gives more consistent sun exposure across the full length of the bed, since the sun's arc crosses it evenly rather than favoring one end. East to west orientation can help in cooler climates during early spring, since one side warms up faster and holds heat longer into the evening.
The rule that matters more than compass direction: always put tall or trellised crops (pole beans, staked tomatoes, cucumbers on a trellis) on the north side of the bed if you're in the Northern Hemisphere. Get this backward and your tomato vines will shade out the lettuce you planted expecting full sun.
Before locking in any orientation, spend a few days watching your actual site. Note where shadows fall at 9 AM, noon, and 4 PM, and check for anything that changes seasonally, like a deciduous tree that's bare in March but fully leafed out by June.
What's the Right Soil Mix and Drainage Setup?
Raised beds live or die on what you fill them with. A few tested ratios cover most situations:
- Standard blend: three-quarters topsoil to one-quarter compost, a solid default for beds sitting on native soil.
- Compost-heavy mix: two-thirds topsoil to one-third compost, better for beds that will grow heavy feeders like tomatoes or squash.
- Mel's Mix: equal parts compost, vermiculite, and peat or coir, the standard fill for square-foot gardening systems because it stays loose and drains fast without added fertilizer.
Drainage problems usually show up as standing water after rain or a bed that stays soggy for days. If your native soil is heavy clay, work in coarse sand or perlite before filling, or install a simple French drain or perforated tubing beneath the bed. Slope the bed roughly 2% away from your house or any structure so runoff moves away rather than pooling against a foundation.
For depth, stick with 6 to 12 inches for shallow-rooted crops and 12 to 24 inches for anything on concrete, pavers, or deep-rooted vegetables. When ordering bulk soil, calculate volume in cubic feet, divide by 27 to get cubic yards, and add 5 to 10% extra since organic matter compresses noticeably during its first season.
How Do I Space Plants for Maximum Yield?
Square-foot gardening solves the spacing question with a system anyone can memorize. A standard 4×4 bed divides into 16 individual squares, and each square holds a set number of plants based on that crop's mature size:
| Plants per square foot | Example crops |
|---|---|
| 1 plant | Tomato, pepper, broccoli, cabbage |
| 4 plants | Lettuce, Swiss chard, marigold |
| 9 plants | Bush beans, spinach, beets |
| 16 plants | Carrots, radishes, onions |
Sprawling crops like squash, cucumbers, or melons need to claim two, four, or more squares depending on the variety, so account for that footprint before you finalize your grid.
Placement inside the grid follows the same north-side rule as trellising: put your one-plant-per-square crops (the tall ones) along the north edge, and cluster your fast-maturing, 9 and 16-count crops in the squares you'll replant most often. Radishes and lettuce clear out in three to four weeks, so treat those squares as rotating slots rather than fixed plantings.
Succession planting keeps those slots working instead of sitting empty. As soon as you pull spent radishes or lettuce, drop in a fresh round of seeds or transplants, staggering plantings every two to three weeks so you're not harvesting (or replanting) everything at once. Physical grid markers, whether string, wood lath, or PVC pipe, help enforce the spacing so you don't drift back into wider, less efficient row spacing out of habit.
What Materials Work Best for Building Raised Beds?
Untreated cedar or redwood resists rot naturally and lasts 10 to 15 years without chemical treatment, though it costs more upfront than pine. Treated lumber lasts longer but some gardeners avoid it near edible crops. Stone, concrete block, and composite lumber cost more but essentially last forever. A no-frame mound (just piled, amended soil) works if you don't mind a less defined edge and slightly more erosion over time.
Building the bed itself follows a straightforward sequence:
- Stake the corners and run string to mark your exact footprint before any digging.
- Build or assemble the frame on level ground, checking corners for square.
- Fill with your chosen soil mix, watering lightly as you go to settle air pockets.
- Level the surface and check that the frame sits evenly on all sides.
- Mulch the paths around the bed to control weeds and reduce mud.
Pro Tip: Check your bed's height if you or anyone gardening with you has knee or back limitations. A bed built at 24 to 30 inches tall lets someone garden from a seated position or standing without bending, and it's far easier to add that height during construction than to retrofit it later.
How Do I Set Up Irrigation and Mulch for Raised Beds?
Drip irrigation beats overhead watering for raised beds because it delivers water straight to the root zone without wetting foliage, which cuts down on fungal problems in dense plantings. Run your main drip line down the long axis of the bed and branch off with quarter-inch microtubing to individual emitters, a setup that keeps water pressure even across the full length instead of trickling out before reaching the far end. A soaker hose looped through the bed works as a simpler, cheaper alternative for smaller setups.
Mulch does double duty on paths and inside beds:
- Wood chips on paths cut down on mud and suppress weeds between beds.
- Straw or shredded leaves inside beds retain moisture and moderate soil temperature.
- Refresh path mulch once or twice a season as it breaks down or compacts.
A basic seasonal rhythm keeps beds productive: amend soil with compost before spring planting, check irrigation lines and mulch depth midseason, then clear spent plants and add a fresh compost layer after harvest. Walking the beds weekly to spot aphids, hornworms, or early blight matters more in dense square-foot plantings, since problems spread faster when plants sit close together.
What's the Best Workflow for Planning a New Garden Bed?
A reliable planning sequence saves you from expensive rework:
- Measure your site and note existing structures, slopes, and shade sources.
- Map sunlight across a full day, ideally over a few days in different weather.
- Sketch bed footprints at your chosen width and length.
- Lay out your grid or spacing plan on paper before buying materials.
- Calculate soil and material quantities (remember: cubic feet divided by 27 equals cubic yards, plus 5 to 10% extra).
- Plan your irrigation route along the bed's long axis.
- Set a build schedule that accounts for curing time if using certain treated woods.
Extension guidance consistently recommends locking in permanent structures and sun mapping first, then layering in the planting plan, since moving a built bed is a lot harder than erasing a pencil line.
This is where a tool like Veete earns its place in the process. Instead of guessing at soil volume with a calculator and a notepad, you can model a 4×8 bed in 3D, watch the materials list update as you adjust dimensions, and export a shopping list before you've bought a single board.
Copy-and-Adapt Layout Templates
A few proven footprints cover most home setups:
- 4×4 square-foot bed: 16 squares, ideal for a first-time grower testing the system on a small footprint.
- 4×8 productivity bed: essentially two 4×4 grids side by side, sharing one drip line and a single access path.
- 2 to 3-foot narrow bed: runs along fences or walls where only one-sided access is possible.
- U-shaped island: wraps around a central path, giving full access from the inside and outside edges at once.
How Do Companion Planting and Crop Rotation Fit Into Your Layout?
Companion planting works best when you build it into the grid rather than treating it as an afterthought. Pairing tomatoes with basil, or carrots with onions, isn't just folklore. It's a spacing decision: these combinations use different root depths and canopy heights, so they don't compete for the same light or root zone within a square.
Crop rotation matters even more in a fixed raised bed, since you can't just move to a new field next season. Heavy feeders like tomatoes and squash deplete nitrogen fast, so plan to follow them with legumes (beans, peas) that fix nitrogen back into the soil, then rotate into leafy greens or root crops the following season. Keeping a simple written record of what grew in each square by year prevents you from replanting the same nightshade family (tomatoes, peppers, eggplant) in the same spot repeatedly, which builds up soil-borne disease over time.
The grid structure of a square-foot layout actually makes rotation easier to track than a traditional row garden, since you're rotating discrete squares rather than trying to remember where an entire row sat two seasons ago. Some gardeners assign each square-foot section a rotation family (nightshades, legumes, brassicas, roots) and simply shift that family one bed over each year, cycling through a three or four-year rotation without much mental math.
How Do I Extend the Growing Season Without Redesigning Everything?
Cold frames and row covers let you stretch your harvest window without touching your bed's footprint. A cold frame is essentially a mini greenhouse box, often built to match your bed's exact width, that sits on top of the soil and traps heat during cool spring and fall nights. Since it matches your existing 4-foot bed width, you don't need a separate structure. You just add a lid.
Simple hoop covers do similar work at lower cost: bend PVC pipe or metal hoops over the bed and drape frost cloth or plastic sheeting across them. This buys you two to four extra weeks on each end of the season in most temperate climates, letting you start seedlings earlier and push tender crops later into fall.

Seasonal layout adjustments don't require rebuilding anything. In early spring, use half your grid for cold-tolerant crops like spinach and peas while the other half waits for warmer soil. As those cold-season crops finish, that space opens up for tomatoes or peppers once the risk of frost passes. This staggered approach keeps every square working instead of leaving half your bed empty during shoulder seasons.
Should I Add Perennials to a Vegetable Bed Layout?
Perennials change how you think about your grid, since they occupy the same square for years rather than one season. Asparagus, rhubarb, and perennial herbs like chives, oregano, and thyme all fall into this category, and none of them play well with annual crop rotation.
The practical fix: dedicate a separate bed, or a fixed section within a larger layout, specifically to perennials. Asparagus needs 12 to 18 inches of depth and a spot it won't be disturbed for a decade or more, so mixing it into a rotating square-foot grid defeats the purpose of both systems. A narrow 2 to 3-foot bed along a fence line works well for a perennial herb strip, since it's separate from your main rotation but still within easy reach for harvesting.
If space is tight, corner plantings solve the problem without a dedicated bed. Tuck a couple of rhubarb crowns or a rosemary bush into a corner of your yard that isn't part of the active grid, treating it as a permanent landscape feature rather than part of the vegetable rotation. This keeps your square-foot beds free for the annual crops that actually benefit from yearly rotation, while still giving you low-effort perennial harvests.
An Editor's Take on Garden Bed Layout Mistakes
Design for access first, soil second, then density. Most failed layouts I've seen trace back to one mistake: beds built too wide, forcing gardeners to step into the soil to reach the middle, which compacts everything the raised bed was supposed to fix. Get the width right before you obsess over the perfect soil mix.
— Rokas
Turn Your Sketch Into a Priced, Buildable Plan
Once you know your bed widths and path spacing, the slow part is turning that sketch into an actual materials list and budget. Veete lets you build your garden bed layout in 3D and watch pricing update live as you adjust dimensions, so a 4-foot bed that becomes 4×8 instantly recalculates lumber, soil volume, and cost instead of sending you back to a calculator.

Try modeling a 4×8 raised bed with paths and a drip line route, then export the materials list before you buy anything. The free plan requires no card and covers a single project, while the Home plan runs $48 per year (or $6 per month) for gardeners managing multiple beds or projects across a season. If you want to see how the tool handles a full layout, start at Veete and sketch your first bed today.
Where This Guidance Comes From
The dimensions, spacing rules, and soil advice in this article draw from land-grant university extension programs that test these recommendations in real gardens, not just theory. The University of Georgia's garden planning guidance covers bed width, depth, and orientation. Colorado State Extension backs the block-style layout and irrigation guidance. Texas A&M AgriLife Extension supplies the soil mix ratios and drainage fixes. University of Maryland Extension informs the planning workflow and seasonal system approach.
Sources
- Garden planning guidance (University of Georgia extension, C-1027)
- Block style layout in raised bed vegetable gardens (Colorado State Extension)
- Building a raised bed garden (Texas A&M AgriLife Extension)
- Growing vegetables in raised beds (University of Maryland Extension)
FAQ
How Should I Lay Out My Garden Beds?
Start with 4-foot-wide beds arranged in a block or square-foot grid, with 18 to 24-inch paths between them for comfortable access. Orient beds north to south when possible for even sun, and always place tall or trellised crops on the north edge so they don't shade shorter plants. A tool like Veete lets you test different bed arrangements in 3D before committing to a physical layout.
What Is the 70/30 Rule in Gardening?
The 70/30 rule generally refers to filling roughly 70% of your growing space with reliable, proven crops and reserving about 30% for new varieties or experimental plantings. It's a risk-management approach rather than a strict spacing formula, and it works well alongside a square-foot grid where you can dedicate specific squares to trial crops each season.
What Is the 5, 4, 3, 2, 1 Gardening Method?
Definitions of this method vary across gardening resources, and there isn't one universal standard covered by the extension sources referenced in this article. If you've seen it referenced as a specific spacing or planting ratio, treat it as one grower's personal system rather than an established horticultural standard, and default to the plants-per-square-foot counts (1, 4, 9, or 16) instead.
What Is the Most Efficient Garden Layout?
Block-style and square-foot layouts are the most space-efficient options for home vegetable gardens because they eliminate unnecessary walkways and let plants shade out weeds naturally. A 4×8 bed split into two 4×4 grids with a shared drip line typically gives the best balance of yield, access, and manageability for a small yard.
How Deep Should a Raised Garden Bed Be?
Six to 12 inches works for most annual vegetables like lettuce, beans, and herbs. Deep-rooted crops such as carrots and potatoes, along with any bed built on concrete or pavers, need 12 to 24 inches of depth to give roots room to develop properly.