
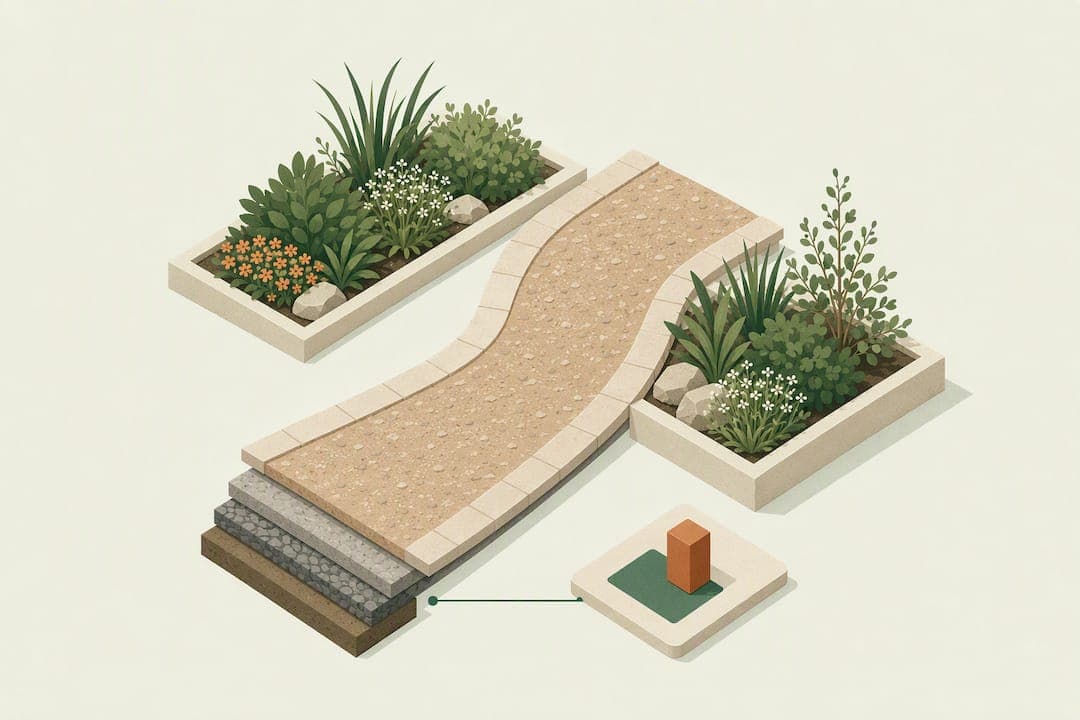
If you need a durable, all-weather route between two fixed points, build it straight and wide with a compacted base under permeable pavers. If you want a leisurely stroll through the garden, a winding stepping-stone or gravel path softened with drifts of planting works better. Either way, map the route with a hose before you dig, then follow the width, gradient, and construction steps below.
TL;DR:
- Gravel paths are the most affordable and easiest to install but require rigid edging and regular topping to prevent spreading.
- For durability and accessibility, use a compacted base with drainage and avoid shallow, unprepared surfaces that crack or shift in winter.
- Path width should be at least 0.9 meters for single walkers and up to 1.8 meters for formal or two-person routes, influencing design style.
- Testing layouts with temporary materials or 3D planning tools like Veete helps identify circulation issues and estimates costs beforehand.
- Seasonal adjustments, such as choosing textured surfaces and evergreen planting, are essential to keep paths safe and visually appealing year-round.
Table of Contents
- Choosing between a practical path and a diverting one
- Materials and surfaces: matching the path to its job
- Width, gradient, and what the numbers mean for comfort
- Basic construction steps and an edging checklist
- Drainage and permeable paving to avoid runoff problems
- Planting and edging that make the path feel finished
- How to lay a stepping-stone path step by step
- Planning paths in 3D before you dig
- Seasonal considerations for path durability and looks
- Cost estimates and budget planning for a garden path
- What I'd try before committing to a permanent path
- Visualize your path in 3D and see the real cost before you build
- Sources
- FAQ
Choosing between a practical path and a diverting one
Garden paths generally fall into two categories, and picking the wrong one is the most common design mistake. A practical path connects two points people use daily, like the back door to the shed or bins, and should be short, direct, and all-weather. A diverting path exists for the walk itself; it curves through borders, slows you down, and rewards you with a view.
Before laying anything permanent, walk the route you actually take and mark it with a hose or length of rope, adjusting until the line feels natural. This "desired line" test catches problems a plan on paper never shows, like a corner that's awkward to walk or a straight line that cuts across a bed you wanted to keep intact.
Once the line is set, use focal points to guide curves and endings:
- Aim a bend toward a bench, tree, or sculpture rather than curving for no reason.
- Use hide-and-reveal, screening part of the garden with planting so a path's end is a small discovery.
- Keep sightlines open where safety matters, such as near steps or a driveway crossing.
Materials and surfaces: matching the path to its job
Every surface trades off cost, comfort, and upkeep differently, so match the material to how the path gets used rather than to looks alone.
- Gravel is cheap and quick to lay but shifts underfoot and needs a firm edge to stop it migrating onto lawns or beds.
- Paving stone and concrete pavers give a smooth, durable surface that suits wheelbarrows, wheelchairs, and daily traffic.
- Brick offers a traditional look and good grip when wet, though it can heave in freeze-thaw climates without a solid base.
- Timber decking or sleepers work well for boardwalk-style paths over damp ground but rot faster than stone.
- Grass or stepping stones suit occasional, slow foot traffic and fit a relaxed, diverting route best.
For high-traffic or wheeled use, choose a continuous hard surface over loose gravel or widely spaced stones. Edging needs vary too: gravel demands rigid edging such as metal or timber, while brick and pavers often need only a compacted base and edge restraint to stay put.
Width, gradient, and what the numbers mean for comfort
Width and slope decide whether a path feels generous or cramped, and both have practical minimums. A single walker needs about 0.9 meters (3 feet); two people walking side by side need roughly 1.2 meters (4 feet); a path meant to feel formal or grand works better at 1.5 to 1.8 meters, according to Gardens Illustrated.

Path width shapes formality just as much as material does. A narrow, curving path reads as informal, while a wide, straight one signals a main route.
Keep these rules in mind when planning gradient and crossfall:
- Gentle, even slopes drain better and are easier to walk on than steep, uneven ones.
- Cross-slope (crossfall) should stay minimal so water sheds without creating a hazard underfoot.
- On steeper routes, pedestrian design guidance recommends rest areas and gentler ramp gradients to keep the route accessible for slower walkers or wheeled users.
- A dead-straight path with no width variation tends to look institutional in a residential garden, so consider a slight taper or a subtle bend at a junction.
Basic construction steps and an edging checklist
A durable path comes down to preparation more than the surface material itself. Skip the base work and even good paving stone will heave, sink, or crack within a couple of seasons.
- Mark the final route with stakes and string, following your earlier hose test.
- Excavate to the required depth, removing turf and loose soil.
- Lay and compact a base layer of crushed stone or gravel for drainage and stability.
- Install edging first so it holds the base and surface material in place.
- Lay the surface material, whether pavers, brick, gravel, or stepping stones.
- Compact and level the finished surface, checking for even drainage fall.
- Walk the path and check for wobble, tilt, or standing water before calling it done.
Pavers and stepping stones typically need a bed dug 6 to 10 inches deep to accommodate a gravel base and bedding layer. A weed barrier under gravel or loose stone paths cuts down on long-term maintenance.
Pro Tip: Bed stepping stones on a layer of compacted pea gravel rather than directly on soil. It lets you tap each stone flush and level, and it settles far less overtime, which means fewer trip hazards.
Drainage and permeable paving to avoid runoff problems
Solid, impermeable surfaces send rainwater straight into drains or neighboring beds, which can worsen runoff and, in some areas, trigger planning requirements. Permeable paving reduces runoff and, when installed correctly, can avoid the need for planning permission in some jurisdictions.
- Gravel, permeable block pavers, and matrix cell systems all let water soak through to the ground rather than run off.
- A free-draining sub-base matters as much as the surface material itself in wetter climates.
- Crossfall and overall slope determine where runoff ends up, so grade paths away from the house and toward a bed or soakaway.
- Before committing to a large impermeable surface, check local rules on hard surfacing and consider a permeable alternative to sidestep the issue entirely.
Planting and edging that make the path feel finished
A path without planting around it looks unfinished no matter how well it's built. Repeating plants in drifts of three, five, or seven creates rhythm along the route instead of a scattered, one-of-everything look.
- Mown grass edges suit informal, diverting paths; clipped or planted borders suit formal, practical ones.
- Metal and Corten steel edging hold gravel firmly and last for decades with minimal upkeep.
- Brick or timber edging fits a cottage-garden look but needs occasional resetting as the ground shifts.
- A short seasonal routine, pulling weeds, topping up gravel, and relevelling stones, keeps any path looking intentional rather than neglected.
How to lay a stepping-stone path step by step
Stepping stones suit a relaxed, diverting route rather than a high-traffic one, and spacing is what makes or breaks the walk.
- Space stones for a natural stride, roughly 60 to 75 centimeters center to center.
- Widen the spacing slightly for a slower household member, such as a child or an older relative.
- Dig each footing 6 to 10 inches deep and bed it on compacted pea gravel.
- Set each stone level and flush with the surrounding ground to avoid a raised lip.
- Check the finished path underfoot for any wobble before planting around it.
For anyone using a wheelchair, walker, or wheelbarrow regularly, a continuous paved surface is a better choice than stepping stones, which interrupt a steady gait.
Planning paths in 3D before you dig
Testing a route on paper or with a hose only goes so far. A 3D planning tool like Veete lets you lay out width, curves, and sightlines on screen and see how a path relates to beds, structures, and the rest of the garden before any digging starts.
The software links pricing directly to each object in the plan, so changing a path's width or swapping gravel for pavers updates the material quantities and total cost automatically. That's useful for a DIYer testing a few layout options, and just as useful for producing a clear shopping list to hand to a contractor. Either way, the plan and the numbers stay in sync as the design changes.

Seasonal considerations for path durability and looks
A path that looks great in June can turn into a hazard by January, so material choice should account for the full year, not just the growing season. Gravel paths tend to scatter more in heavy rain and need topping up each spring after winter runoff carries material into beds and lawns.
Frost heave is a real risk for brick, concrete pavers, and stone set on a shallow base in climates with hard freezes. A proper compacted sub-base with adequate drainage reduces the chance of a path cracking or shifting as the ground freezes and thaws.
Stepping stones and timber can both get slippery when wet or covered in leaves, so a route through shade or under deciduous trees benefits from a textured surface or occasional cleaning in autumn. Grass paths need the least material upkeep but the most seasonal attention, since they wear thin in high traffic during wet months and need mowing and reseeding through the growing season.

Planting along the path shifts the seasonal picture too. Deciduous shrubs and perennials that die back in winter can leave a path feeling bare, while evergreens or ornamental grasses keep some structure through the colder months. Choosing a mix of both keeps the route looking intentional in every season rather than just during peak bloom.
Cost estimates and budget planning for a garden path
Path costs vary widely depending on material, base preparation, and whether the work is DIY or contracted, and there's no single figure that applies everywhere. Gravel is generally the cheapest surface to install because it needs the least base preparation and no cutting or setting, while natural stone paving and brick sit at the more expensive end due to material cost and labor-intensive laying.
Budgeting realistically means pricing three separate elements: the base and drainage layer, the surface material itself, and edging. Skipping the base to save money is the most common way a path budget backfires, since a poorly prepared path often needs redoing within a few years, which costs more overall than doing it properly once.
Getting an accurate estimate before buying materials avoids both overspending on excess stock and underbuying, which delays a project mid-build. Measuring the route, width, and depth carefully, then pricing gravel, pavers, or brick against local supplier rates, gives a realistic number to work from rather than a rough guess.
What I'd try before committing to a permanent path
Before you commit to a material or a curve, test it. Lay temporary stepping stones or mark a gravel path with rope for a week and walk it daily. Small experiments like this catch width and circulation problems that a plan on paper never reveals.
— Rokas
Visualize your path in 3D and see the real cost before you build
Veete lets you lay out a path in 3D alongside your beds, lawn, and structures, with pricing linked directly to every material and quantity in the plan. Change the width, swap gravel for pavers, or extend the route, and the totals update with the design instead of needing a separate spreadsheet.

Anyone testing layout options can start on the free plan, while contractors and design professionals managing multiple projects may find the Home or Pro plans worth the subscription for exportable plans and shopping lists. Open a path template and test a route before you buy a single stone.
Sources
- Garden path ideas: how to make a garden path | Gardens Illustrated
- Down the Garden Path | K‑State Research and Extension
- Front gardens and permeable paving | RHS Advice
- Pedestrian network guidance — Paths (NZTA)
FAQ
What is the most affordable way to build a path in my garden?
Gravel is generally the cheapest surface because it needs minimal base preparation and no cutting or setting labor. Adding rigid edging keeps costs low while stopping the material from spreading into beds or lawns.
What is the easiest DIY garden path to build?
A stepping-stone path is one of the simplest DIY options since it needs less excavation and no continuous surface to level. Spacing stones for a natural stride, roughly 60 to 75 centimeters apart, and bedding them on compacted pea gravel keeps the project manageable in a weekend.
How do I create a path in my garden?
Start by walking your everyday route and marking it with a hose or rope to find the desired line before digging. From there, excavate, lay a compacted base, install edging, and finish with your chosen surface material.
How wide should a path be between raised beds?
A path for one person needs about 0.9 meters (3 feet), while a path meant for two people walking side by side or wheelbarrow access should be closer to 1.2 meters (4 feet), based on Gardens Illustrated's design guidance. Tighter spacing between raised beds can work for occasional access but makes daily use and tool handling harder.