
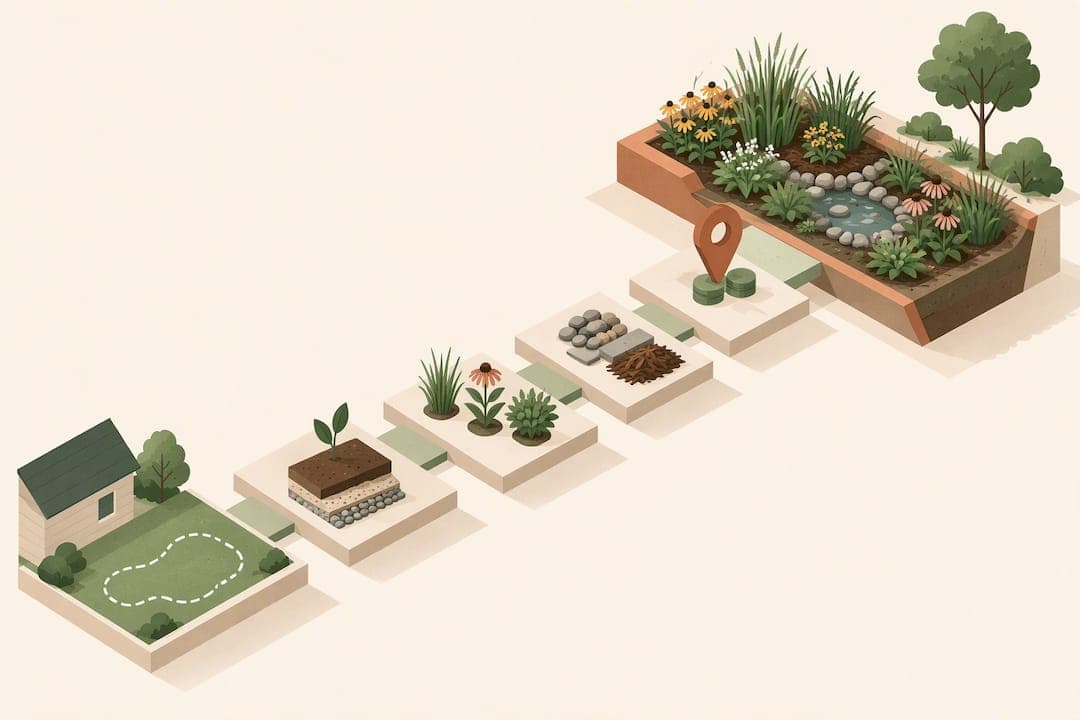
A rain garden is a shallow, planted depression that catches rooftop and driveway runoff and lets it soak into the ground instead of running into the street. The single rule that makes or breaks one: build the ponding area to hold water no deeper than about 6 to 9 inches and confirm it drains within 24 to 48 hours. Get that right and you reduce runoff, filter pollutants, and add real landscape value.
TL;DR:
- A rain garden should have a ponding depth of 6 to 9 inches and drain within 24 to 48 hours to effectively reduce runoff and filter pollutants.
- Site selection is critical; keep the garden at least 10 feet from structures, 25 feet from wells, and avoid poorly drained or permanently wet areas.
- The garden size typically ranges from 10% to 30% of the drainage area, with sandy soils allowing smaller, shallower basins, and clay requiring larger or deeper designs.
- Soil infiltration rates faster than a quarter inch per hour generally eliminate the need for an underdrain, but slower soils will require amendments or an underdrain system.
- Proper construction and ongoing maintenance, especially during the first year, are essential to prevent clogging, erosion, and standing water beyond two days.
Table of Contents
- How rain gardens work and why they're worth building
- Is a rain garden right for your site?
- Sizing and depth: a homeowner-friendly calculation
- Soils, infiltration tests, and when to amend or add an underdrain
- Design elements that make a rain garden actually work
- Plant selection and planting zones
- Construction steps, materials, and what to expect
- Maintenance, monitoring, and mistakes that shorten a garden's life
- Practical planning: using 3D tools and live pricing for your rain garden project
- A homeowner's case for starting small
- Plan and cost your rain garden before you dig
- FAQ
- Sources
How rain gardens work and why they're worth building
A rain garden functions in three stages. Water ponds temporarily in the shallow basin, filters down through soil and plant roots, and soaks into the ground rather than pooling on a lawn or draining into storm sewers. The planted soil and root systems do the filtering work, trapping sediment and taking up nutrients before they reach groundwater or nearby waterways.

The pollutant removal numbers back this up. Monitored rain gardens typically remove around 65% of phosphorus and about 50% of nitrogen from the runoff that passes through them, and runoff reduction effectiveness has ranged from 51.3% to 99.8% across different U.S. climate zones, depending on local precipitation patterns and soil conditions.
Beyond water quality, homeowners install rain gardens for a mix of practical and aesthetic reasons:
- Slowing and capturing runoff reduces erosion along driveways, slopes, and foundation edges.
- Native plantings create habitat for pollinators and birds that a mowed lawn doesn't support.
- A well-placed garden adds visual interest and curb appeal in a spot that might otherwise stay soggy and bare.
- Redirecting water away from the house can ease pressure on storm drains during heavy rain events.
Is a rain garden right for your site?
Not every yard is a good candidate, and the siting decision matters more than any other design choice. Start by checking distances from structures and utilities, since getting this wrong can mean standing water near a foundation or contamination risk near a well.
- Keep the garden at least 10 feet from building foundations and roughly 25 feet from septic systems or wells, following setback guidance used in state and university manuals.
- Walk the yard during a storm and watch where water actually flows. The path water takes naturally, not where you assume it goes, tells you where to place the inlet.
- Avoid spots that stay wet for days after rain. A persistent low spot usually signals poor native drainage, which means more prep work or a different location.
- Call your local utility locate service before any digging begins, so you don't hit buried lines.
- Note sun exposure across the proposed footprint, since it determines which plants will actually thrive there.
Pro Tip: Site the garden on a gentle slope between 1% and 12% grade. Flat ground won't direct water in, and steep slopes make the berm harder to build and more prone to erosion.
A yard with heavy clay that never seems to dry out, or one close to a basement with a history of moisture problems, needs extra scrutiny before you commit to a location. The percolation test in a later section will give you a definitive answer, but a quick walk-through during rain saves time before you measure anything.
Sizing and depth: a homeowner-friendly calculation
Sizing a rain garden comes down to one relationship: how much impervious area drains into it, and how deep you're willing to let water pond. A widely used rule of thumb sizes the garden footprint at 10% to 30% of the impervious drainage area feeding it, with the exact percentage depending on how fast your soil absorbs water. Sandy, fast-draining soil lets you build smaller and shallower; dense clay pushes you toward the larger end of that range or a deeper basin.
Ponding depth guidance commonly lands between 6 and 9 inches for residential designs, though some manuals recommend shallower basins around 3 inches for smaller, low-traffic areas. Depth and area trade off against each other: a deeper basin needs less surface area to hold the same volume of water, but it also concentrates ponding time in a smaller footprint, which can stress plants at the center.
Here's a worked example using a roof section as the drainage area, for illustration only:
- Say your roof section draining to one downspout covers 600 square feet.
- At 10% sizing, your garden footprint would be about 60 square feet.
- At 20% sizing, it would be about 120 square feet.
- With a 7-inch ponding depth, the 60-square-foot garden holds roughly 35 cubic feet of water, while the 120-square-foot garden holds about 70 cubic feet.
A homeowner with sandy soil and fast infiltration can reasonably aim for the smaller end of that range.
Soils, infiltration tests, and when to amend or add an underdrain
Before you dig anything, test how fast your soil actually drains. Dig a hole about 12 inches deep and 6 inches wide, fill it with water, let it drain once to saturate the surrounding soil, then refill it and time how far the water level drops per hour.

A soil that infiltrates at a rate of about a quarter inch per hour or faster is generally considered suitable for a basic rain garden without an underdrain, according to common design guidance. Anything slower suggests you'll need amended soil, an underdrain, or both.
A phenomenon called perching explains why amending the surface soil alone sometimes isn't enough. Loose, well-draining soil placed over dense, compacted native clay can drain quickly at first, then back up because the water has nowhere to go once it hits the denser layer underneath. When your percolation test comes back slow, a perforated underdrain tied to gravel storage beneath the amended soil is usually the fix, not just more compost mixed into the topsoil.
When amending is the right call, manuals often recommend an engineered mix in the range of 50% to 60% sand, 20% to 30% topsoil, and 20% to 30% compost to balance infiltration with enough organic matter for plants to establish. A few practical notes on sourcing:
- Buy sand and compost separately and mix on site rather than trusting a pre-blended "garden soil" bag to hit the right ratio.
- Ask a local landscape supplier for washed sand, since fine sand can clog pore space and slow drainage.
- Test a small batch of your mix with the same percolation method before amending the whole bed.
Design elements that make a rain garden actually work
A rain garden is more than a hole with plants in it. Five components work together to manage the water safely and keep the system functioning over years, not just one season.
- Inlet: water enters either as sheet flow off a lawn, through a vegetated swale, or directly from a downspout extension, and the entry point needs rock or erosion-control fabric to prevent the incoming flow from carving a channel.
- Pretreatment: a small forebay, a grass filter strip, or a rock-lined apron ahead of the main basin catches sediment before it reaches the planted area, which keeps the main basin from clogging over time.
- Ponding zone: the shallow basin itself, shaped and graded to hold the design depth evenly rather than puddling unevenly on one side.
- Berm and weir: a compacted earthen berm on the downhill side holds water in, and a stabilized low point, or weir, lets excess water exit in a controlled way during larger storms.
- Overflow and outlet: a stabilized spillway routes water that exceeds the design storm safely away from the garden, ideally toward another vegetated area rather than a neighbor's yard or a foundation.
Technical design guidance recommends adding a gravel storage bed and perforated underdrain when native soils can't meet infiltration targets on their own, particularly on constrained urban lots where the garden needs to handle a larger contributing area than its footprint alone would suggest.
Pro Tip: Build the overflow path first and test it with a hose before you plant anything. It's far easier to regrade an empty basin than to fix erosion after the plants are in.
Plant selection and planting zones
Plant placement follows the water, not the other way around. Divide the basin into three rough zones based on how often each area holds moisture: the wet zone at the center and near the inlet, a mesic transition zone on the slopes, and a dry zone along the outer edges and berm top.
- Sediment-catchers: sturdy, moisture-loving plants near the inlet that tolerate occasional heavy flow and help trap incoming debris.
- Deep-root stabilizers: native grasses and perennials with extensive root systems that hold soil in place and keep infiltration channels open over time.
- Pollinator forbs: flowering natives that draw bees and butterflies and extend bloom time across the growing season.
- Ornamental grasses and edge plants: drought-tolerant species for the dry outer zone that add structure and winter interest after flowers fade.
Mixing plant types rather than relying on one or two species tends to improve how well a garden holds up across wet and dry stretches, since different root depths and growth habits respond differently to the same conditions. A monoculture of one grass species, for instance, leaves the whole bed vulnerable if that species struggles in a particularly wet or dry year.
Plant in spring or fall when temperatures are mild, water regularly through the first growing season while roots establish, and apply 2 to 3 inches of mulch around (not touching) plant stems to suppress weeds and retain moisture. By the second season, well-chosen native perennials typically need little supplemental watering beyond normal rainfall.
Construction steps, materials, and what to expect
Once you've tested your soil and finalized a layout, construction itself typically takes a weekend to a few days for a basic residential garden, longer if you're adding an underdrain or working with difficult soil.
- Mark the garden outline, inlet path, and overflow route with stakes or marking paint.
- Excavate to the design depth, keeping the base level so water ponds evenly rather than pooling on one side.
- Run your percolation test again at the excavated depth to confirm infiltration before backfilling.
- Amend soil or install a gravel bed and perforated underdrain if your test results call for it.
- Shape the berm on the downhill side and stabilize the weir and overflow spillway with rock or erosion fabric.
- Plant according to your moisture zones, then mulch the entire bed.
For a materials checklist, plan on soil amendment volume based on your footprint and depth, washed gravel if an underdrain is needed, perforated pipe, hardwood mulch, erosion control fabric for the inlet and outlet, and native plants sized to your zone layout. A basic DIY build with native soil and no underdrain tends to cost far less than an enhanced system requiring excavation equipment, imported soil mix, and underdrain materials.
Most homeowners can handle a small, well-drained basic garden with hand tools. Bring in a contractor or landscape professional when the site has heavy clay requiring an underdrain, a slope steep enough to need engineered grading, or proximity to a foundation where mistakes carry real risk.
Maintenance, monitoring, and mistakes that shorten a garden's life
A rain garden needs more attention in its first year than afterward, but it's not high-maintenance once established. Check it monthly through the first growing season, then shift to a seasonal schedule: clear debris from the inlet and forebay, refresh mulch annually, and watch for bare or eroded spots after big storms.
The simplest performance check is timing how long water sits after a heavy rain. If ponding regularly lasts longer than 24 to 48 hours, something needs attention, whether that's a clogged inlet, compacted soil, or a basin that was sized too small for the drainage area it's handling.
- Clogged inlets or forebays are the most common reason gardens underperform, and the fix is usually just clearing accumulated leaves and sediment.
- Erosion at the overflow suggests the spillway needs more rock stabilization or a wider channel.
- Oversizing can leave edge plants chronically dry even as the center stays wet, which calls for moving dry-zone plants outward or reshaping the basin.
- Standing water past 48 hours points to a drainage problem that likely needs a percolation retest and possibly an underdrain retrofit.
Pro Tip: Decaying mulch and standing water after storms can attract pests. If you notice recurring issues, targeted pest management guidance can help you address the problem without disrupting the garden's plantings.
Practical planning: using 3D tools and live pricing for your rain garden project
Laying out a rain garden on paper rarely matches how it looks once you're standing in the yard. With Veete's 3D planning tool, we let you map your proposed basin, inlet, berm, and overflow path directly onto a model of your actual yard, so you can check sightlines, confirm setback distances from your foundation or septic system, and see how the shape reads from your patio or front window before anyone breaks ground.
Because pricing in the tool is tied directly to the objects in your design, adjusting the basin size or swapping a gravel underdrain into the plan updates your materials list and cost estimate automatically. That makes it easier to compare a basic native-soil build against an enhanced version with amended soil, without recalculating quantities by hand. We still recommend running your own percolation test and checking local permitting requirements, since our tool supports planning and budgeting rather than engineering or legal approval.
A homeowner's case for starting small
My own bias, after reading through the design manuals, is toward conservative sizing and sturdy inlets over ambitious layouts. Start smaller than the maximum the rule of thumb allows, monitor how it drains for a season, and expand later if you have the appetite.
Hire a professional when your soil fails the percolation test outright, when the garden sits within a few feet of a foundation, or when the slope exceeds what a hand-dug berm can safely hold. Those are the situations where a mistake costs real money to fix.
— Rokas
Plan and cost your rain garden before you dig
Figuring out how much soil, gravel, and plant material a rain garden actually needs is one of the more tedious parts of the project, and it's easy to underestimate until you're halfway through a delivery order. We built Veete as a browser-based 3D planning tool that lets you lay out beds, inlets, berms, and plantings directly on a model of your yard, with live pricing linked to every object so your estimate updates the moment you resize the basin or swap in an underdrain.

Our free plan requires no card to start, and it's enough to map a single rain garden project from first sketch to a finished materials list you can hand to a contractor for quotes. When you're ready for more projects or advanced export options, our Home and Pro plans add the extra capacity. Start a free project at Veete and see your layout and budget side by side before you buy a single bag of mulch.
FAQ
What are the disadvantages of a rain garden?
A rain garden built on poorly draining soil without an underdrain can hold standing water past the within a couple of days threshold, creating mosquito breeding conditions and root rot. Undersized or poorly maintained gardens also risk clogged inlets and erosion at the overflow, and the upfront labor of excavation and soil amendment is more involved than standard garden bed installation.
How do you build a simple rain garden?
A basic rain garden starts with a percolation test to confirm your native soil drains fast enough, then excavation to a shallow basin roughly 6 to 9 inches deep, sized at 10% to 30% of the impervious area draining into it. From there, you shape a berm on the downhill side, add a stabilized overflow, and plant native species zoned by moisture tolerance.
How deep does a rain garden need to be?
Most residential rain gardens use a ponding depth between 6 and 9 inches, though some designs call for shallower basins around 3 inches depending on the site and local guidance. The right depth depends on your soil's infiltration rate and how much surface area you have available, since a deeper basin needs less footprint to hold the same volume.
What are some common rain garden mistakes?
The most frequent mistake is skipping the percolation test and building a basin that never drains within the within a couple of days target. Other common errors include undersized inlets that erode during heavy storms, neglected forebays that let sediment clog the main basin, and oversizing a garden so the outer edges stay chronically dry.
Sources
- Rain gardens: bioretention cells — Pennsylvania State University Extension
- Rainscaping resources — Purdue Extension
- Determine the size and depth of the rain garden — ACES blog
- Iowa Rain Garden Design & Installation Guide (Polk SWCD)