
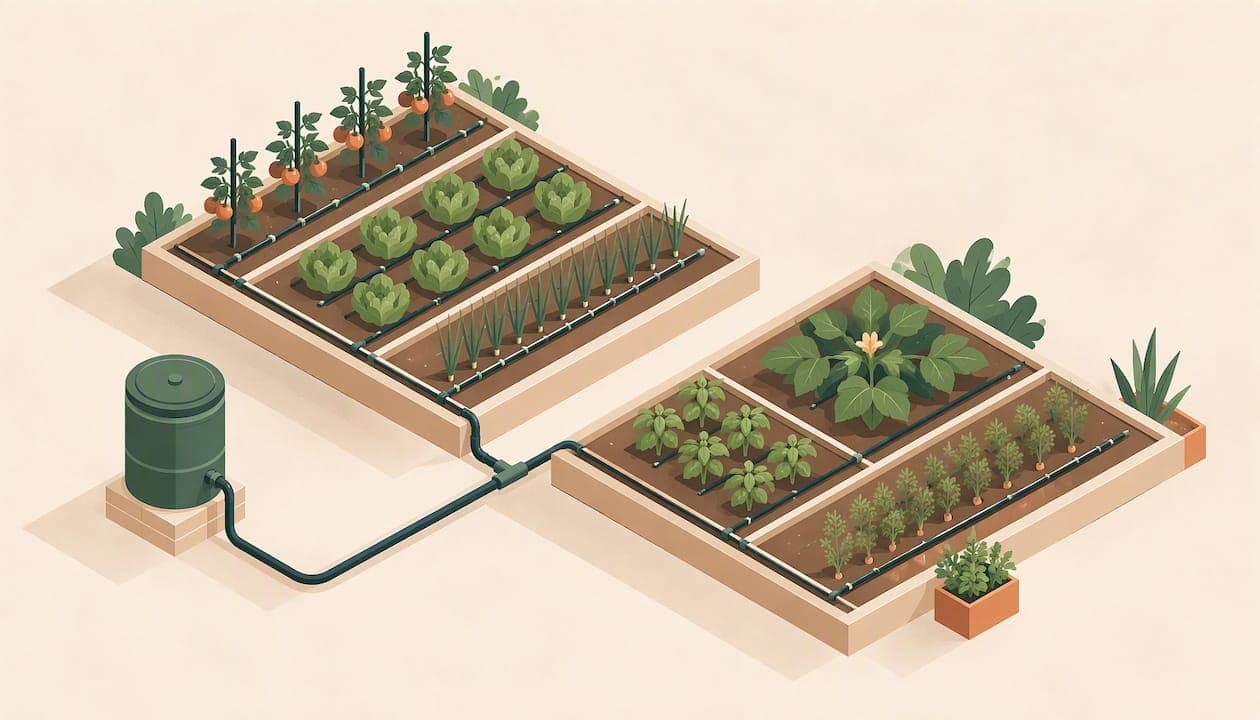
A good drip irrigation layout starts with the plants, not the tubing. Map what you are watering, group it by water need into zones, size each zone so the emitters at both ends of a line deliver nearly the same flow, and only then draw the mainline and count parts. Do it in that order and the shopping list, the install and the water bill all get easier.
This guide walks through that process for a home yard: vegetable beds, shrub borders, foundation plantings and trees. It covers the layout patterns that work, the numbers that keep a system uniform, burial depth, cost, and the planning mistakes that cause dry corners and soggy ones.
TL;DR
- Design from the plant outward: water need first, then emitters, then lateral lines, then the manifold and mainline.
- Give each zone one kind of plant and one watering schedule. Mixing lawn, vegetables and trees on one valve is the most common layout error.
- Keep flow variation across a zone to about 10% or less, which in practice means short lateral runs and a pressure regulator and filter at the head.
- Draw the layout to scale and attach quantities and prices to it, so a change to one bed updates your parts list instead of leaving you with a stale estimate.
Table of Contents
- Why the layout matters more than the parts
- Step 1: Map the yard and the water source
- Step 2: Group plants into zones
- Step 3: Pick the layout pattern for each bed
- Step 4: Size the tubing and emitters
- Step 5: Draw the mainline, manifold and head assembly
- Step 6: Decide how deep to bury it
- Step 7: Price the layout before you buy
- Where drip layouts and lawn decisions meet
- Our perspective: plan the water and the money on the same drawing
- Plan your drip layout in Veete
- Common layout mistakes to avoid
- FAQ
- Sources
Why the layout matters more than the parts
Drip works because it puts water slowly into the soil at each plant, through emitters or in-line dripline, as University of California extension guidance for home gardens describes it. The same publication reports that drip systems are frequently cited as over 90% efficient, against roughly 50 to 70% for sprinklers and hand watering that lose water to runoff, evaporation and overspray.
That efficiency is only available if the layout is right. A drip system with the wrong tubing length, no pressure control or three plant types on one valve wastes the advantage. Parts are cheap. Rework after the mulch is down is not.
Step 1: Map the yard and the water source
Before you choose any component, get three things on paper.
- A scaled outline of the beds, trees, paving and structures. Measure each bed's length and width, and note the distance from each to the spigot or tap.
- The water source details. Note the spigot location, whether you will tie into an existing irrigation line, and the pressure and flow you actually have. A simple way to check flow is to time how long a 5-gallon bucket takes to fill at the spigot. Divide gallons by minutes and multiply by 60 for gallons per hour.
- Slope and soil. Low points collect water and high points drain it. Sandy soil needs closer emitters because water moves down more than sideways. Clay needs slower application so it does not pool.
If you also want to deal with runoff while you are mapping, mark where water currently leaves the roof, patio and lawn. A drip plan and a drainage plan share the same base drawing, and we cover the drainage side in our guide to front yard landscaping with drainage first.
Step 2: Group plants into zones
A zone is a set of lines controlled by one valve (or one hose-end timer). Everything in a zone gets the same run time, so everything in it should want the same amount of water.
Sort your plants into groups like these:
| Zone type | Typical contents | Layout approach |
|---|---|---|
| Vegetable and annual beds | Rows or blocks, shallow roots | Parallel dripline across the bed |
| Shrub and perennial borders | Established plants, deeper roots | Single or double line along the row |
| Widely spaced shrubs | Large individual plants | Concentric rings with point emitters |
| Trees | Deep roots, large wetted area | Multiple emitters spread around the canopy |
| Containers | Small volume, dry out fast | Separate zone, own schedule |
Agriculture Victoria's planning guide for drip systems lists water quality, soil type and variation, root zone depth and plant numbers among the factors to settle first. That is farm guidance, but the sequence holds in a backyard: plant water need, then emitters, then laterals, then the mainline.
Sun and shade matter too
A bed of the same shrubs split between full sun along a south fence and shade under a maple will not want the same water. If the difference is large, make two zones even when the plants match.
Step 3: Pick the layout pattern for each bed
Three patterns cover most home gardens. The University of California Master Gardeners of Contra Costa County illustrate them in their guide to grid, snake and ring layouts.
Grid for beds of closely planted crops
Parallel lines of dripline with built-in emitters run across the bed. That guide suggests equal spacing, a 3-inch mulch cover, wire stakes about 25 inches apart, and no more than 3 gallons per minute in any one sub-zone.
For a 4-foot-wide vegetable bed, two or three lines the length of the bed is a common starting point, with line spacing set by your soil. Tighter in sand, wider in clay. If you are drawing 4x8 beds, our raised bed layout templates give you the footprint to start from.
Snake for rows of shrubs and perennials
A single line follows the planting row, stakes about 24 inches apart. For medium plants with a mature width of 24 to 48 inches, the same guide recommends a double line. It also suggests at least three emitters per plant on each side of the root ball, and blank tubing across gaps where nothing needs water.
Ring for widely spaced large shrubs
Concentric rings of tubing circle the plant. The first ring can be about 2 to 2.5 feet in diameter, with each successive ring 18 inches farther out, reaching the mature drip line of the shrub. Blank tubing connects the rings. Add rings as the plant grows instead of replacing the system.
Trees need a different approach
Tree roots reach far past the trunk, and water quality affects where you put emitters. A New Mexico State University circular on drip systems explains that salts concentrate at the edges of the wetted soil area, so wet patterns near the trunk should overlap to keep salt from building up against the bark. In a yard, that means several emitters spread around the tree and moved outward as it grows, not one emitter at the trunk.

Step 4: Size the tubing and emitters
This is where most paper layouts fail. Uniformity is a design goal, not a hope. Oklahoma State University Extension's drip irrigation fact sheet sets the target of no more than a 10% difference in discharge between the lowest and highest emitter in a zone. Miss it and some plants get stressed while others sit wet.
You control that variation with four decisions:
- Run length. Longer lines lose pressure to friction. Retail suppliers publish limits per tubing size, and the common figures are about 200 feet for 1/2-inch tubing and about 30 feet for 1/4-inch. Check the maximum on the product you buy, since it varies with emitter flow and spacing.
- Total flow per zone. Add up emitter flow (gallons per hour) for every emitter on the valve. It must be below your measured spigot flow, with room to spare. Pressure-compensating emitters help on slopes and long runs.
- Pressure. Most drip tubing is designed for low pressure, commonly around 25 psi, so a regulator at the head of each zone is standard. Follow the rating on your product.
- Elevation. On a slope, water drains to the low end when the system shuts off. Run lines along contours rather than up and down, and use pressure-compensating or check-valve emitters at the low points.
A worked example
Say you have a 4 x 16 foot vegetable bed with three lines of dripline, each 16 feet long, with 0.5 gallon-per-hour emitters every 12 inches.
- Emitters per line: 16, so 48 in total.
- Zone flow: 48 x 0.5 = 24 gallons per hour.
- That is far below what a typical spigot supplies, so you could add a second bed of similar size to the same zone, provided the plants share a schedule.
The same arithmetic for a shrub border with 20 shrubs at 4 emitters each, 1 gallon per hour per emitter, is 80 gallons per hour. Put the two on the same valve and you have 104 gallons per hour, but the run times they need are different, so they belong on separate zones. Flow fits, schedule does not.
Step 5: Draw the mainline, manifold and head assembly
Work backward from the plants. Each lateral line connects to a mainline of larger tubing, which connects to the valve or spigot.
A typical head assembly from the water source outward is: backflow preventer, shutoff, timer or valve, filter, pressure regulator, then the mainline. Drip emitters have tiny openings, so a filter is not optional.
Some layout habits that save trouble:
- Feed long lines from the middle rather than one end, so each half is shorter.
- Put a flush valve or open end cap at the far end of each lateral so you can flush debris out.
- Keep the mainline along edges, paths and fences, away from places you will dig.
- Leave a simple loop of slack where tubing crosses a bed edge, since it expands and contracts with temperature.
Step 6: Decide how deep to bury it
Most home drip is laid on the surface under mulch, which keeps it visible, cheap to fix and easy to extend. The mainline may be buried. Burial rules vary by project type and by place, so check your local requirements before you dig.
To see how wide the range is, compare two official sources. The City of Evans, Colorado, irrigation specifications set out cover requirements for landscape pipe that run in the 8 to 10 inch range depending on location. Under Texas rules for subsurface dispersal, lines with emitters for wastewater drip dispersal must sit between 6 and 48 inches deep. The second is a wastewater rule, not a garden standard, which shows why depth depends on the job.
For a vegetable or ornamental bed, surface or shallow-mulched lines are the usual choice. For subsurface lines under turf, plan to call 811 before digging to locate utilities.
Step 7: Price the layout before you buy
Every element in the drawing becomes a line on the budget: tubing by the foot, emitters, fittings, stakes, a filter, a regulator, a timer, mulch to cover the lines. The labor is the other half if you hire someone.
For context on professional installs, HomeCostCalc models smart drip full-coverage systems at about $1.20 per square foot, against about $0.50 per square foot for basic spray zones, with whole-system installs typically running $1,500 to $8,000 as of 2026. Those are modeled estimates for one Connecticut market, so treat them as a sanity check and get local quotes.
Site conditions move the number. A cost calculator from UseCalcPro notes that soil conditions can swing subsurface drip labor by 15 to 25%, while surface layouts are mostly immune. That is one more reason to keep a first system above ground.
The practical point: quantities from your drawing must match the prices in your budget. If you move a bed or add a zone, the tubing length changes, and so does the cost.

Where drip layouts and lawn decisions meet
Many homeowners add drip when they shrink or replace turf. If you are weighing that, a landscaper's overview of drought-tolerant lawn alternatives shows options that avoid a full tear-out. Whatever you choose, keep turf on its own zone. Grass needs far more water, more often, than drip-irrigated beds.
Our perspective: plan the water and the money on the same drawing
We build Veete because the usual garden plan is two documents that drift apart: a sketch of the beds and a spreadsheet of costs. Someone moves a bed by three feet, the sketch changes, and the spreadsheet does not. With irrigation that mistake is costly, because tubing, fittings and run lengths all depend on distances.
Our view is that the layout and the estimate should be one object. In Veete you draw beds, lawns, paving, plantings, fencing and structures in 3D, and the prices are attached to those objects and to your own supplier rates. Change a bed and the quantities and totals follow. That is what keeps a drip plan honest: you see the length of the run and what it costs while you are still deciding where it goes.
We would rather you measure twice on screen than discover on a Saturday that you are 40 feet of tubing short. And we would rather you design zones around plants than around the parts that happen to come in a kit.
— Rokas
Plan your drip layout in Veete
If you want to draw your beds, check distances and see a live cost for the materials, you can start on the Free plan without a card. The Home plan is 6 EUR per month or 48 EUR per year, and Pro, for landscapers and contractors who need branding and handover documents, is 19 EUR per month or 168 EUR per year. See what each plan includes on the Veete pricing page. For the budget side of the whole yard, our landscape cost guide is a good companion.
Common layout mistakes to avoid
- Mixing plant types on one zone. Lawn, vegetables and trees need different run times.
- No pressure regulator or filter. Both protect emitters and keep flow uniform.
- Lines too long. Split into two feeds or add a second zone.
- Ignoring slope. The low end floods, the high end stays dry.
- Burying everything. Surface lines under mulch are easier to inspect and repair.
- Sizing for today's plants. Leave capacity and extra rings for growth.
FAQ
How deep should drip irrigation be buried?
Most garden drip lines sit on the surface under 2 to 3 inches of mulch, and only the mainline is buried. Where pipe is buried, cover requirements depend on location, and Evans, Colorado specifies roughly 8 to 10 inches for landscape lateral pipe. Check local rules and call 811 before digging.
How much water does drip irrigation save?
University of California guidance reports that drip systems are frequently over 90% efficient, compared with 50 to 70% for other methods. Actual savings depend on your climate, soil and how well the system is scheduled.
What are the main parts of a drip system?
From the source: a backflow preventer, valve or timer, filter, pressure regulator, mainline tubing, lateral lines or dripline, emitters, fittings, stakes and end caps or flush valves. Add a controller if you want automatic schedules.
How long can a drip line run?
It depends on tubing size and emitter flow. Retail guides commonly give about 200 feet for 1/2-inch tubing and about 30 feet for 1/4-inch, but always follow the maximum printed for your specific dripline, and keep emitter output within about 10% across the zone.
Sources
- Drip Irrigation for Home Gardens and Landscapes, University of California
- Drip Irrigation Layout Types, UC Master Gardeners of Contra Costa County
- Planning a drip irrigation system, Agriculture Victoria
- Drip Irrigation Systems, Oklahoma State University Extension
- Planning and Operating Pecan Orchards With Drip and Microspray Irrigation Systems, NMSU
- City of Evans Irrigation Specifications
- 30 Tex. Admin. Code § 222.121, Dispersal Zones
- Irrigation System Cost in Stamford, CT, HomeCostCalc
- Drip Irrigation Installation Cost Calculator, UseCalcPro